Add labels and a legend to a territory map
Make an editable territory map readable outside the builder with persistent labels and legend settings.
When to use this
Use these controls before screenshots, PNG export, browser print or any review where viewers need to understand the zones without the editor panels.
Step-by-step workflow
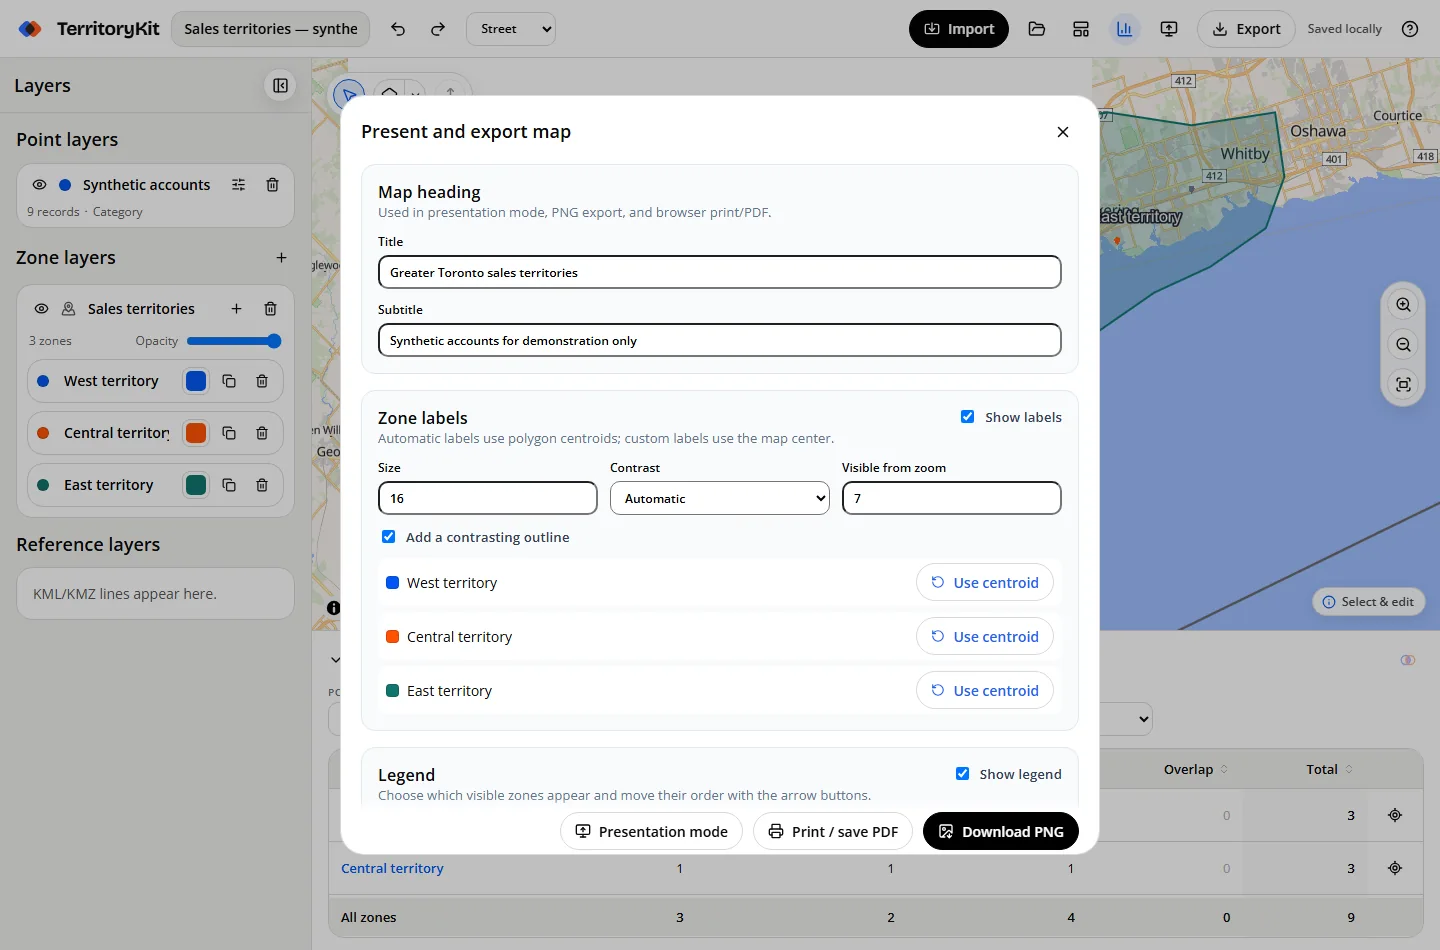
Open Present map
Choose the monitor icon in the top bar to open visual settings.
Configure labels
Turn labels on, set size, automatic/light/dark contrast, outline and the minimum zoom where labels appear.
Place a label manually
Center the map where the label should sit, then choose Place at map center for that zone. Reset to centroid at any time.
Build the legend
Show or hide individual zones and use the arrow controls to order legend entries.
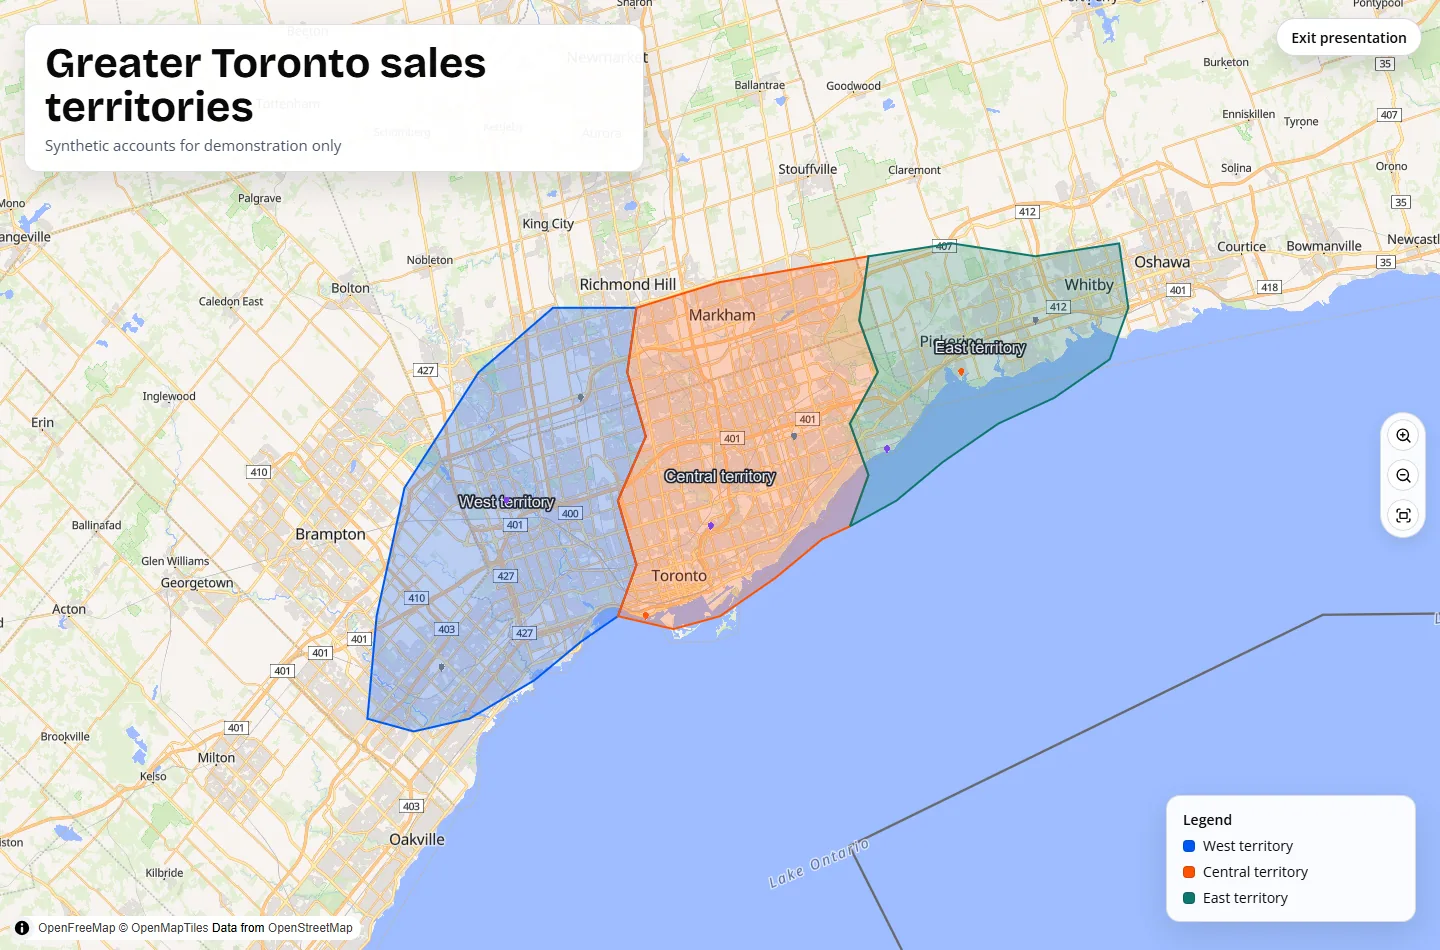
Review presentation mode
Enter presentation mode to hide sidebars, analytics, drawing tools and edit handles.
Supported formats and inputs
- Settings are stored in the local project and portable project export.
- Labels render on the live map and in geometry-only PNG output.
- Title, subtitle and legend render in presentation, PNG and print/PDF workflows.
Tips and common mistakes
- Use automatic contrast first; switch to light or dark only when the basemap requires it.
- Raise the minimum zoom when dense zones create overlapping labels.
- Hide secondary zones from the legend instead of renaming them just for one presentation.
Export and results
Presentation settings travel with project backups, so reopening the project restores the label and legend choices.
FAQ
Can I move one label?
Yes. Place that zone's label at the current map center or reset it to the automatic centroid.
Can I change legend order?
Yes. Use the up and down controls for each visible zone.
Does presentation mode change my geometry?
No. It only changes the viewing surface and clears active editing handles.
Related workflows
Build your first territory map
Bring your coordinates, draw the zones you need, and see the results as the map changes.
Open Map Builder