Map CSV latitude and longitude data
This guide shows how to map CSV latitude longitude data, draw territories around the points, review zone counts, and export the results.
When to use this
Use this workflow when you already have a comma-separated file with one row per location and coordinate columns for each point.
Step-by-step workflow
Check the CSV columns
Use one row per location. Keep latitude and longitude in separate columns, and keep extra fields such as segment, status, owner, or store type in their own columns.
Open TerritoryKit
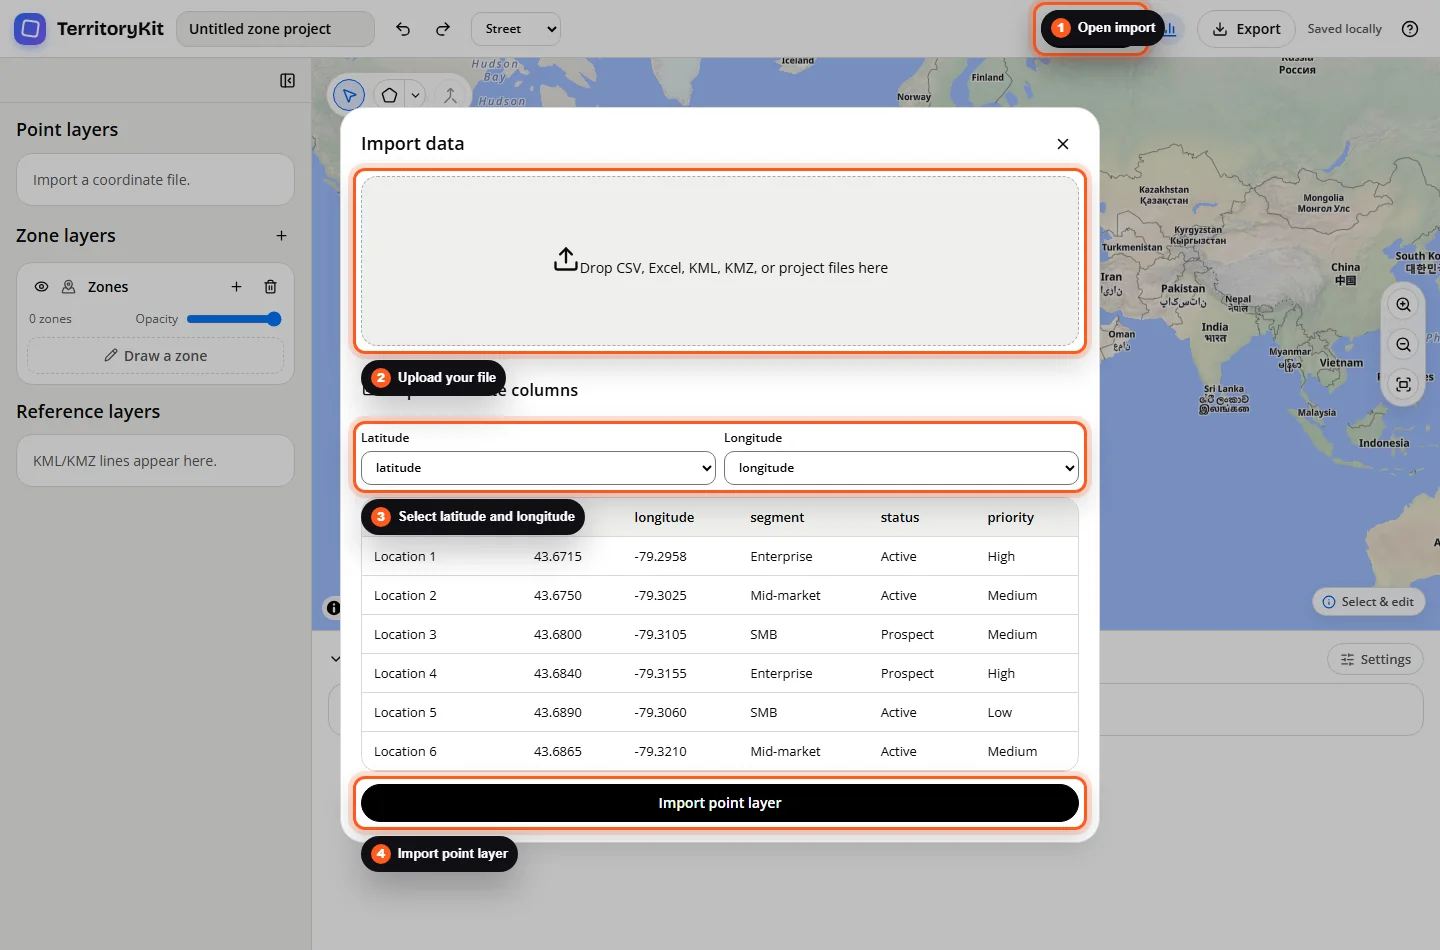
Open the map builder and choose Import from the top bar.
Upload the CSV
Drop the CSV into the import modal or select it from your computer. TerritoryKit detects common coordinate headers such as latitude, lat, longitude, lng, lon, long, x, and y.
Confirm latitude and longitude
If the detected mapping is wrong, choose the correct columns before importing the point layer.
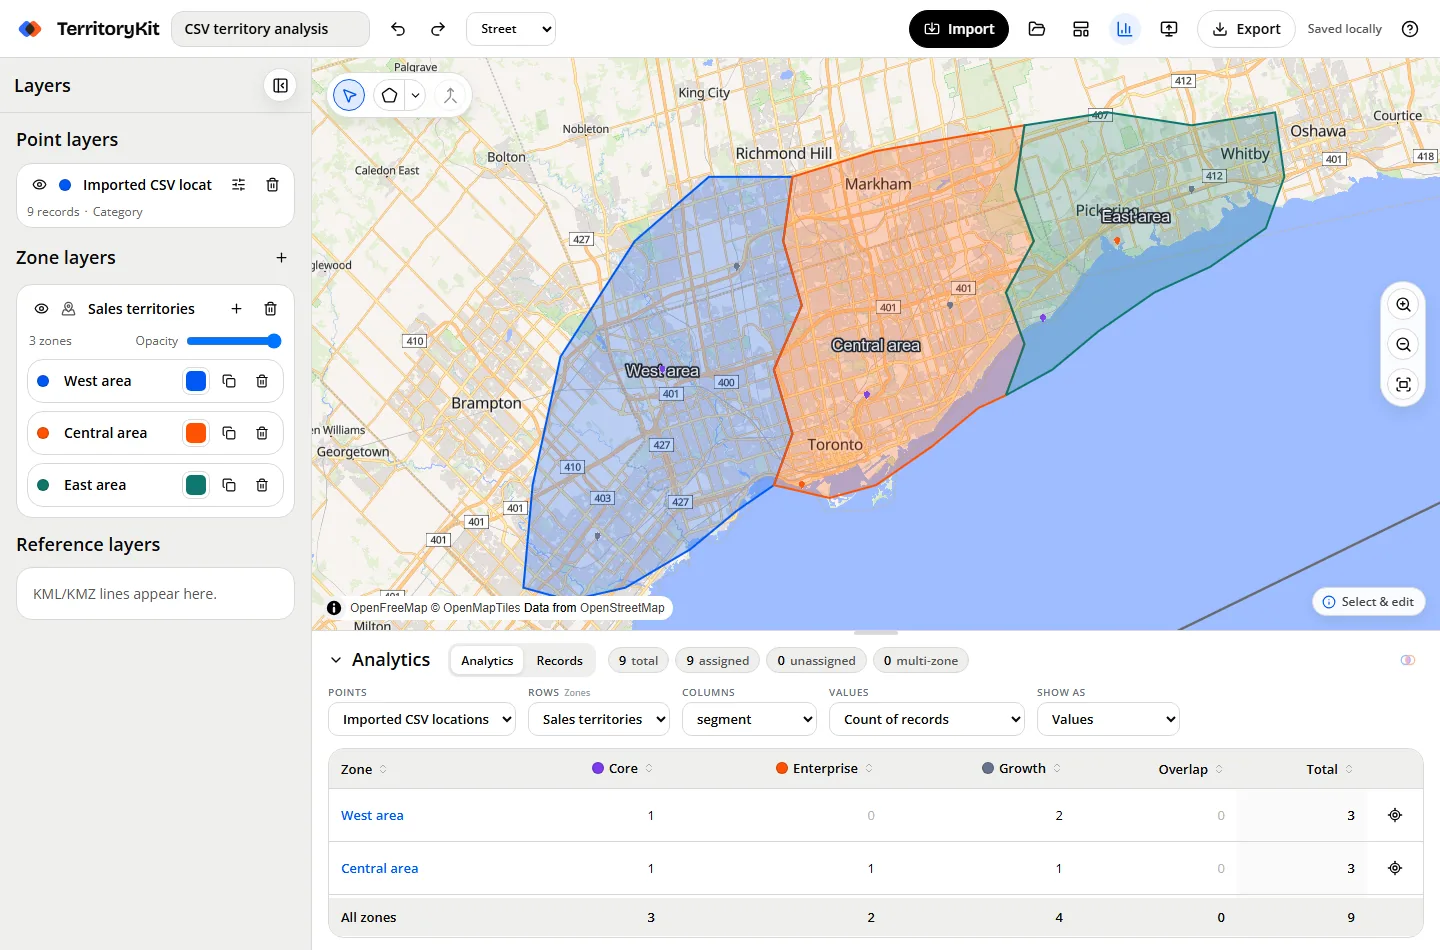
Draw a polygon or circle territory
Use polygon drawing for irregular areas or circle drawing for simple radius-style coverage zones.
Review the analysis
The analytics panel shows total records, assigned records, unassigned records, and multi-zone records for the selected point and zone layers.
Export what you need
Export zone metrics, point membership, zone geometry, or a full project backup.
Supported formats and inputs
- CSV files are supported when rows include valid latitude and longitude values.
- The import preview lets you select the coordinate columns before the point layer is created.
- You can also import XLSX, XLS, KML, KMZ, JSON, and .zonestudio.json files.
- Try the synthetic sample CSV if you want a small file to test.
Tips and common mistakes
- Use decimal degrees, not degrees/minutes/seconds.
- Latitude and longitude should be numeric. Extra symbols or text can cause rows to be skipped.
- Do not swap longitude and latitude. A quick map check usually reveals reversed columns.
- Remove empty rows before import.
- Use unique, readable headers so the column selector is easy to understand.
Export and results
CSV workflows can export metrics as CSV or Excel, point membership as CSV or Excel, zone geometry as GeoJSON or KML, and a portable project file.
FAQ
What columns does the CSV need?
At minimum, it needs latitude and longitude columns. Extra fields are kept as point properties.
Can I use CSV files with semicolon separators?
The importer is built for CSV parsing, but you should test the preview. If columns do not split correctly, save the file as a standard comma-separated CSV.
Can I draw territories after importing CSV points?
Yes. Draw polygon or circle zones, then analyze which points fall inside each zone.
Can I export point-to-zone assignments?
Yes. Export point membership as CSV or Excel after selecting the point and zone layers.
Does TerritoryKit store uploaded CSV data in a cloud account?
No account or cloud workspace is part of the current product. Project data is processed in the browser.
Related workflows
Build your first territory map
Bring your coordinates, draw the zones you need, and see the results as the map changes.
Open Map Builder